

Lots of people have been asking us to update our previous guide on using Gmail and Google Apps under CentOS for Ubuntu. Wait no longer!
As a background, many ISPs block sending email over port 25 which means that you won’t be able to send mail from your Ubuntu server through simple commands like mailx or logwatch. Additionally, you may just want to send your emails via your Gmail/Google Apps account to avoid the emails being flagged as spam. A good way to get around this limitation is to set up a relay through a Gmail account.
The following instructions were tested on Ubuntu 16.04 and 18.04.
REQUIRED PACKAGES
You will need the libsasl2 modules and postfix installed, so install them if you haven’t already with this command:
sudo apt-get install libsasl2-modules postfix
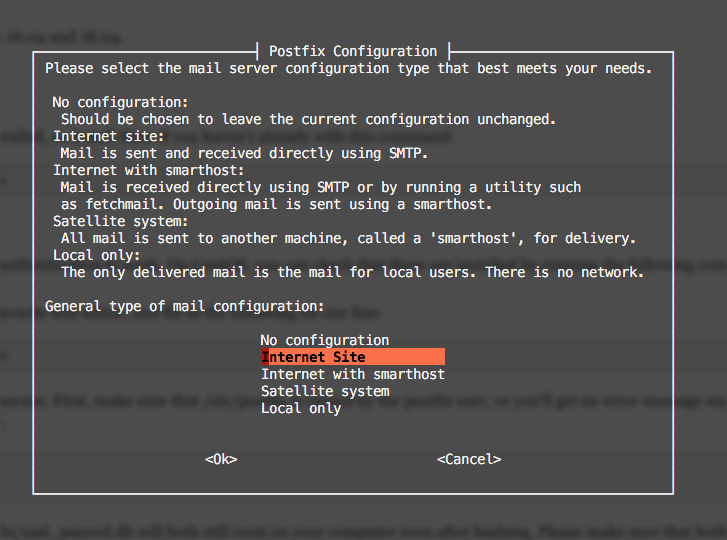
Choose Internet Site when asked in the postfix configuration screen.
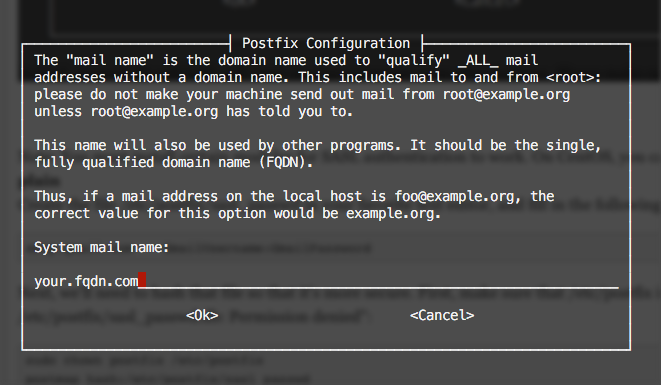
Enter your system’s fully qualified domain name:
GMAIL APP PASSWORD
If you have Two Factor Authentication enabled for GMail, you’ll need to create an app password that you can use for this server to send emails. You can find out how to do that at this link, and then come back here.
CREATE THE PASSWORD FILES
Create the file /etc/postfix/sasl_passwd with sudo in your favorite text editor, and fill in the following on one line:
[smtp.gmail.com]:587 GmailEmail:GmailPassword
Next, we’ll need to hash that file so that it’s more secure. First, make sure that /etc/postfix is owned by the postfix user, or you’ll get an error message stating “postmap: fatal: open database /etc/postfix/sasl_passwd.db: Permission denied”:
sudo chown postfix /etc/postfix
sudo postmap /etc/postfix/sasl_passwd
SECURE THE PASSWORD FILES
The files /etc/postfix/sasl_passwd and /etc/postfix/sasl_passwd.db will both still exist on your computer even after hashing. Please make sure that both are owned by user and group root. Set the file permissions to 600 for both files:
sudo chown root:root /etc/postfix/sasl_passwd /etc/postfix/sasl_passwd.db
sudo chmod 600 /etc/postfix/sasl_passwd /etc/postfix/sasl_passwd.db
EDIT THE POSTFIX CONFIG
With sudo, edit the /etc/postfix/main.cf configuration file:
Find the relayhost line and change it to the following:
#Set the relayhost to the Gmail SMTP server
relayhost = [smtp.gmail.com]:587
Next, add the following lines at the end:
#Set the required TLS options
smtp_tls_security_level = encrypt

#Check that this path exists -- these are the certificates used by TLS
smtp_tls_CAfile = /etc/ssl/certs/ca-certificates.crt

#Set the sasl options
smtp_sasl_auth_enable = yes
smtp_sasl_password_maps = hash:/etc/postfix/sasl_passwd
smtp_sasl_security_options = noanonymous
smtp_use_tls = yes
Restart postfix with this command:
sudo systemctl postfix restart
SENDING MAIL
If you don’t have the mail command installed already, install it with this command:
sudo apt-get install mailutils
Next, use this command to test things out:
echo "Test email" | mail -s "This is a test" youremail@domain.com
You can watch the syslog output to see if there are any errors in your setup – sometimes you’ll see Gmail errors here if something is not configured correctly.
sudo tail -f /var/log/syslog
OTHER NOTES:
Set postfix to only use ipv4 to fix ipv6 routing issues with gmail:
http://linuxmoz.com/google-mail-ipv6-network-is-unreachable-postfix-ipv4-only-fix/
I dont see anything sendmail related, only postfix…